

Overview
The Sensor Assembly is a small PCB (7cm x 3cm) on which the sensors are mounted. On the underside which is exposed when it is screwed in place is a set of 8 way right angle PCB pins.
These pins connect to the 8 way PCB socket wired to the LILYGO® TTGO T5 board.
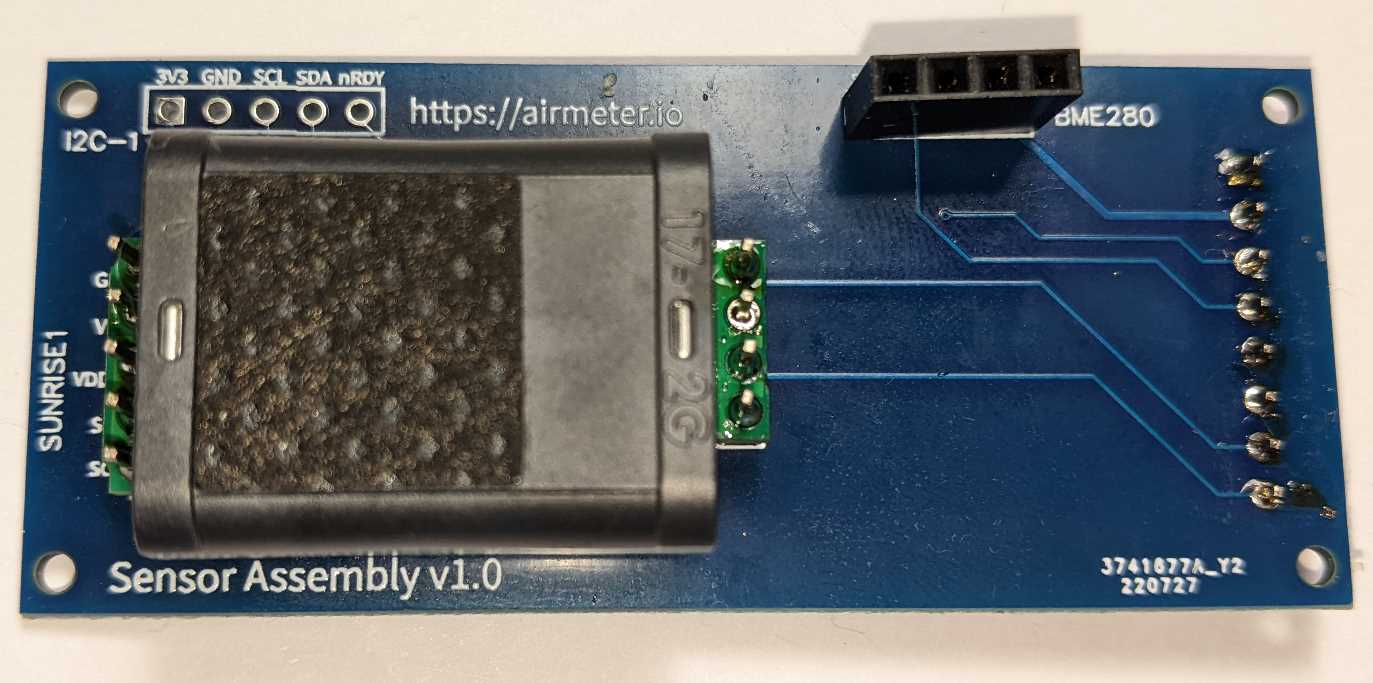
Once completed this part will appear in as shown in the image below.
NOTE: This requires a custom Sensor Assembly PCB which means these steps can be performed in minutes, for a manually wired board see the manually wired universal pcb instructions.
Parts
| Part | Description |
|---|---|
| SensorAssemblyV1.0 | See https://github.com/airmeter-io/SensorAssembly |
| 006-0-0007 or 006-0-0008 | Senseair Sunrise CO2 sensor |
| BME280-5V | BME280 breakout board the 4 pin version which is usually labeled as supporting 5v due to the regulator used |
| 2.54mm socket | 4 Way 1 Row Straight PCB Socket Through Hole |
| 2.54mm pin header | 4 Way, 1 row, straight pin header |
| 2.54mm pin header | 5 Way, 1 row, straight pin header |
| 2.54mm pin header | 8 Way, 1 row, right angle pin header |
Build Steps
- Step 1 - Attach the 8 way right angle pin header
- Step 2 - Mounting CO2 Sensor pin headers
- Step 3 - Attach 4 way PCB Socket for BME280 board
- Step 4 - Attach Sunrise CO2 Sensor
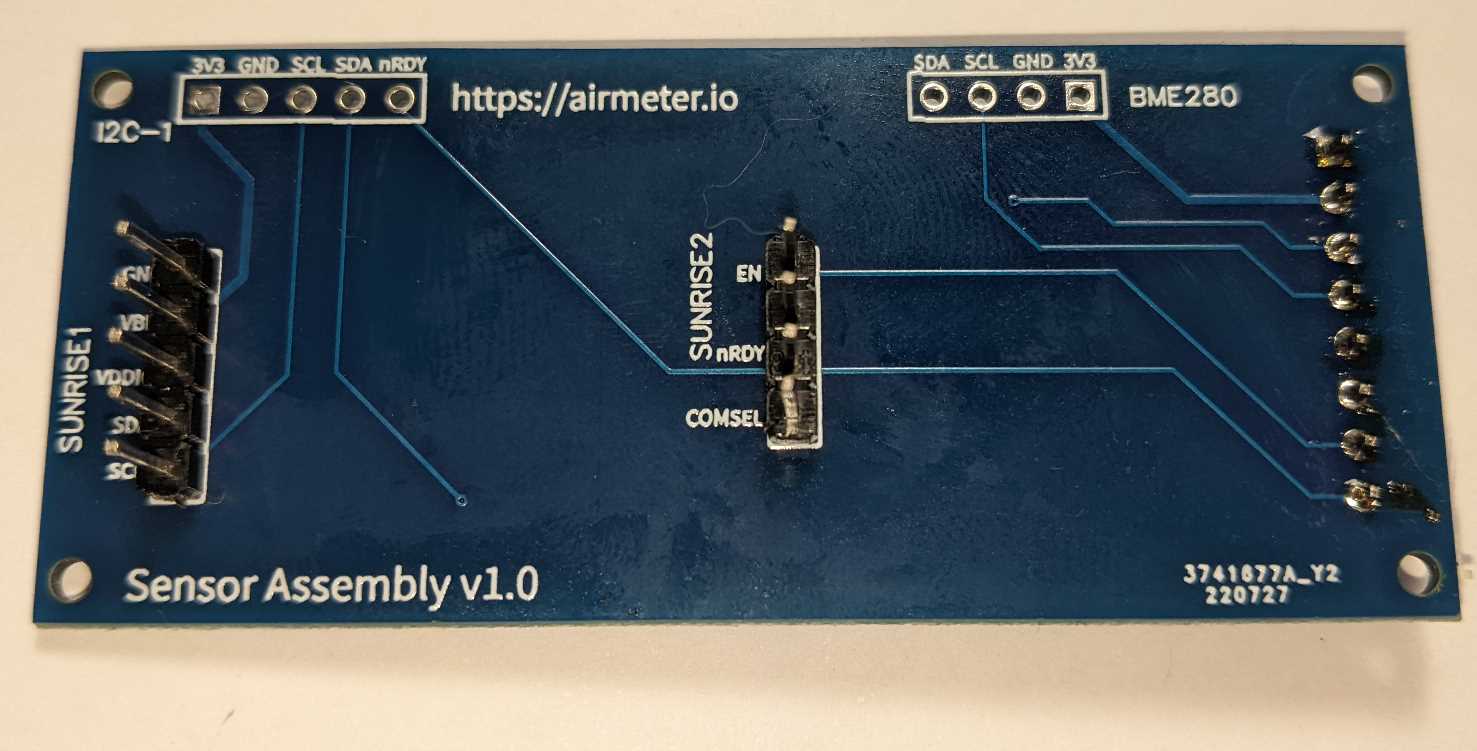
Step 1 - Attach the 8 way right angle pin header
Get the following parts ready before starting this step.
| Part | Description |
|---|---|
| SensorAssemblyV1.0 | The AirMeter.io Sensor Assembly PCB (See https://github.com/airmeter-io/SensorAssembly) |
| 2.54mm pin header | 8 Way, 1 row, right angle pin header |
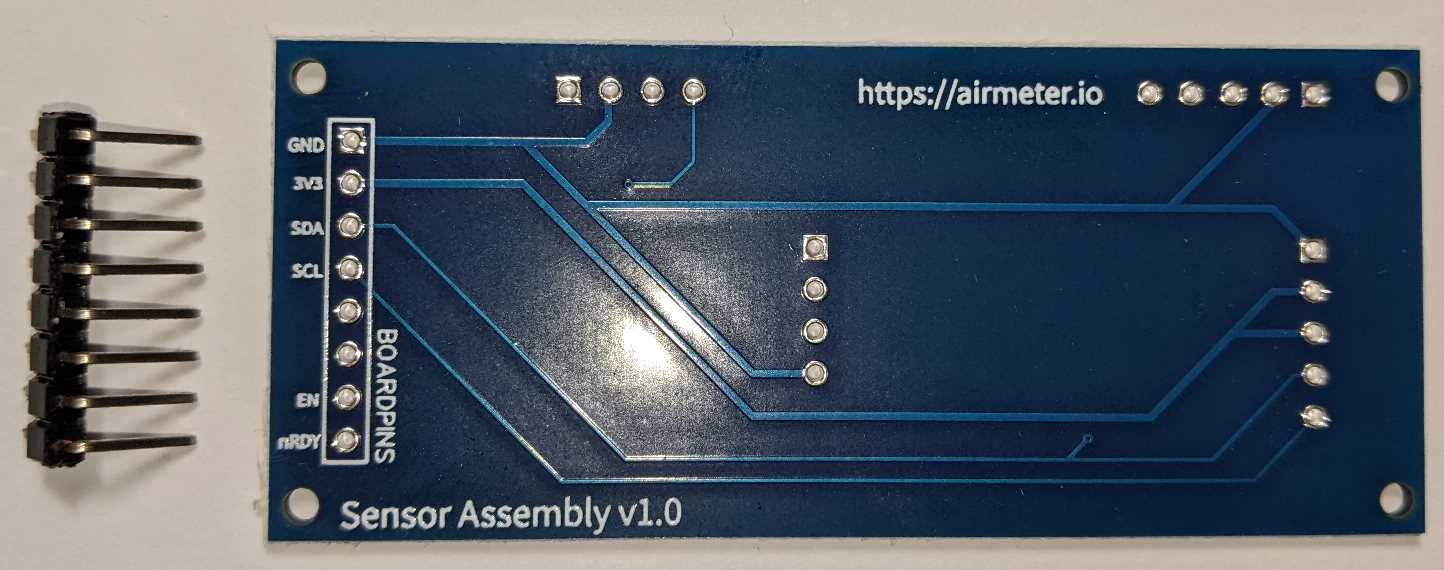
Solder the 8 way pin header to the PCB on the holes marked "BOARDPINS". The pins must face inwards towards the other end of the PCB.
After completing this step the PCB should appear as in the image below.
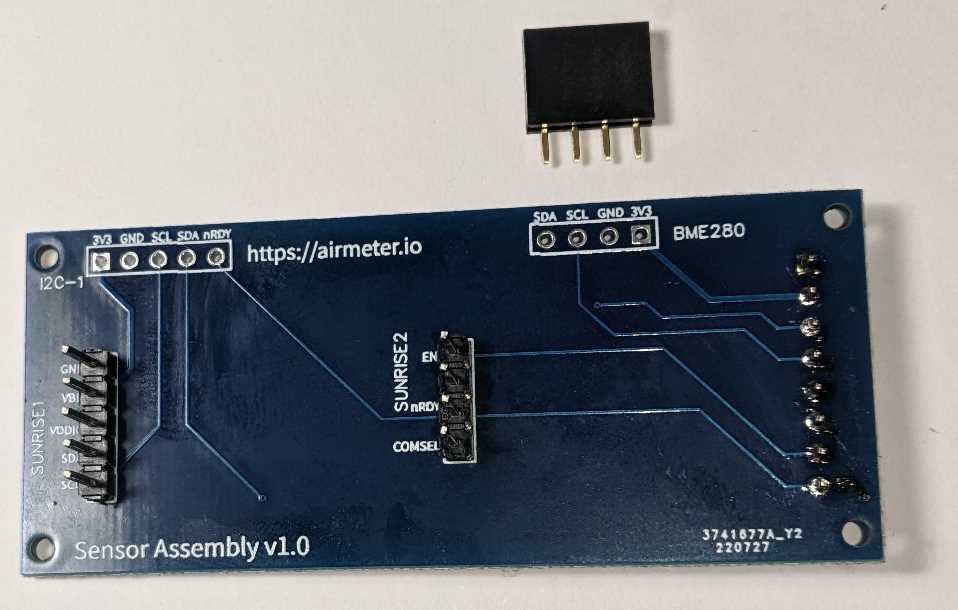
Step 2 - Mounting CO2 Sensor pin headers
Get the following parts ready before starting this step.
| Part | Description |
|---|---|
| SensorAssemblyV1.0 | See https://github.com/airmeter-io/SensorAssembly |
| 2.54mm pin header | 4 Way, 1 row, straight pin header |
| 2.54mm pin header | 5 Way, 1 row, straight pin header |
The pin headers need to be adjusted so that the minimum length extrudes from the rear of the PCB. The pins will stick out on the PCB side to which the sensor is attached. This is the side of the PCB that the pins are labeled.
This is important to allow the PCB to fit within the case, in particular by not putting pressure on the battery.
The parts for this step are shown in the following image:-
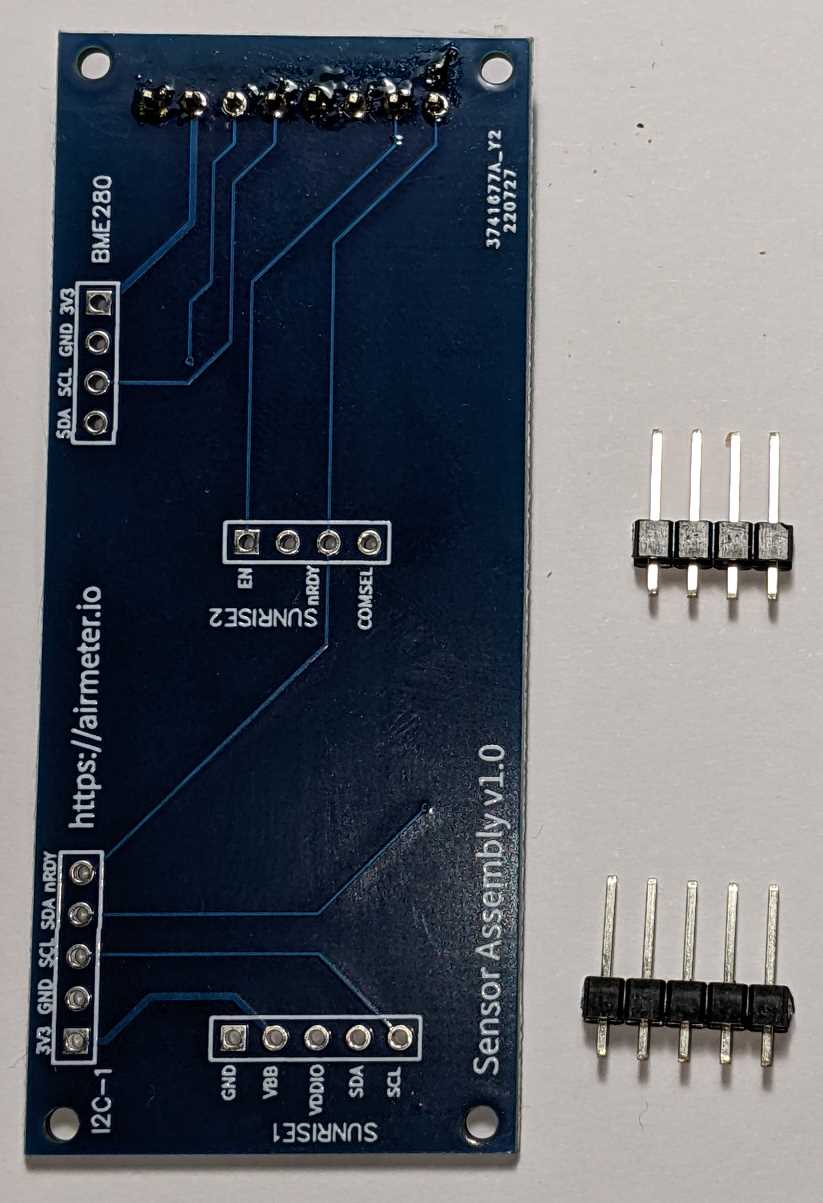
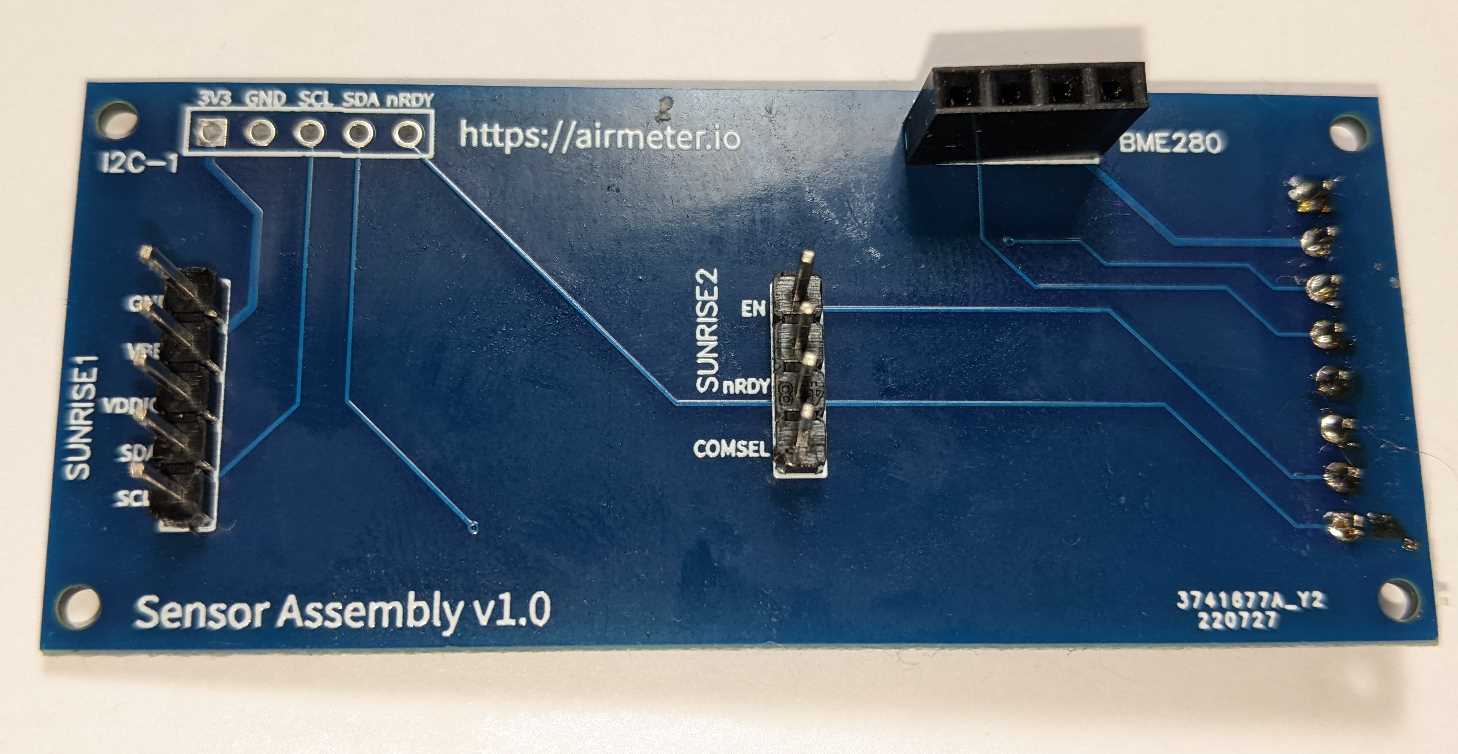
- Solder the 5 way pin header to the 5 holes marked "Sunrise 1" on the PCB. The pins should stick out on the side which is labeled "Sunrise 1" and an extrusion on the other side of the PCB must be minimised.
- Solder the 4 way pin header to the 4 holes marked "Sunrise 2" on the PCB. The pins should stick out on the side which is labeled "Sunrise 2" and an extrusion on the other side of the PCB must be minimised.
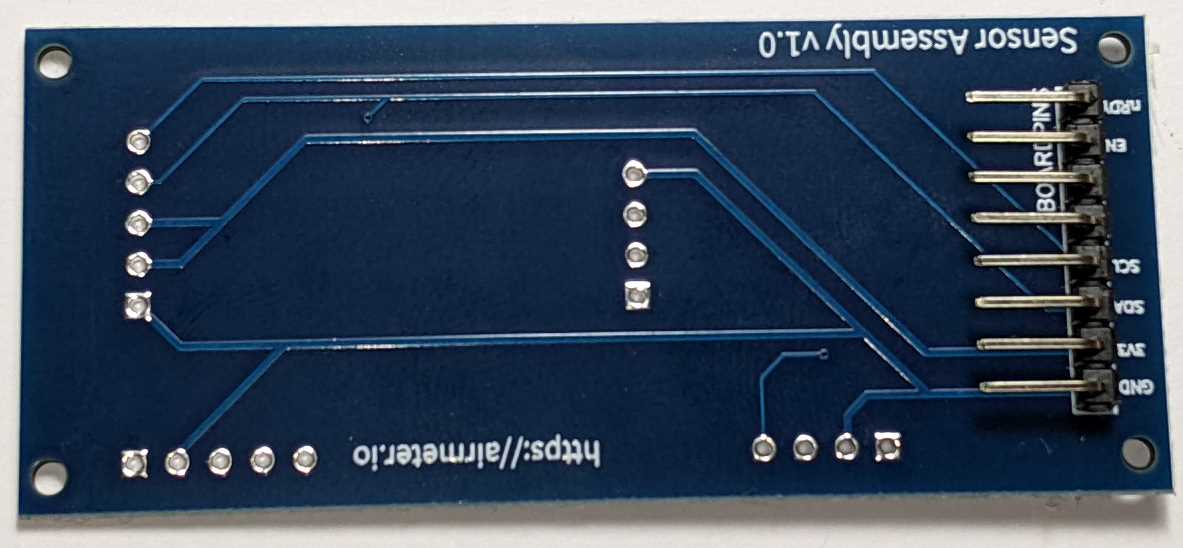
The PCB will appear as shown in the image below when this step is completed.
Step 3 - Attach 4 way PCB Socket for BME280 board
Get the following parts ready before starting this step.
| Part | Description |
|---|---|
| SensorAssemblyV1.0 | See https://github.com/airmeter-io/SensorAssembly |
| 2.54mm socket | 4 Way 1 Row Straight PCB Socket Through Hole |
- Locate the BME280 holes on the PCB.
- Mount the 4 way socket using solder on the side which is labeled BME280.
The PCB will appear as shown in the image below when this step is completed.
Step 4 - Attach Sunrise CO2 Sensor
Get the following parts ready before starting this step.
| Part | Description |
|---|---|
| SensorAssemblyV1.0 | See https://github.com/airmeter-io/SensorAssembly |
| 006-0-0007 or 006-0-0008 | Senseair Sunrise CO2 sensor |
Place the Senseair Sunrise CO2 sensor on the pins attached in Step 2. The pins must align exactly with the Senseair Sunrise PCB if they don't they have not been mounted correctly.
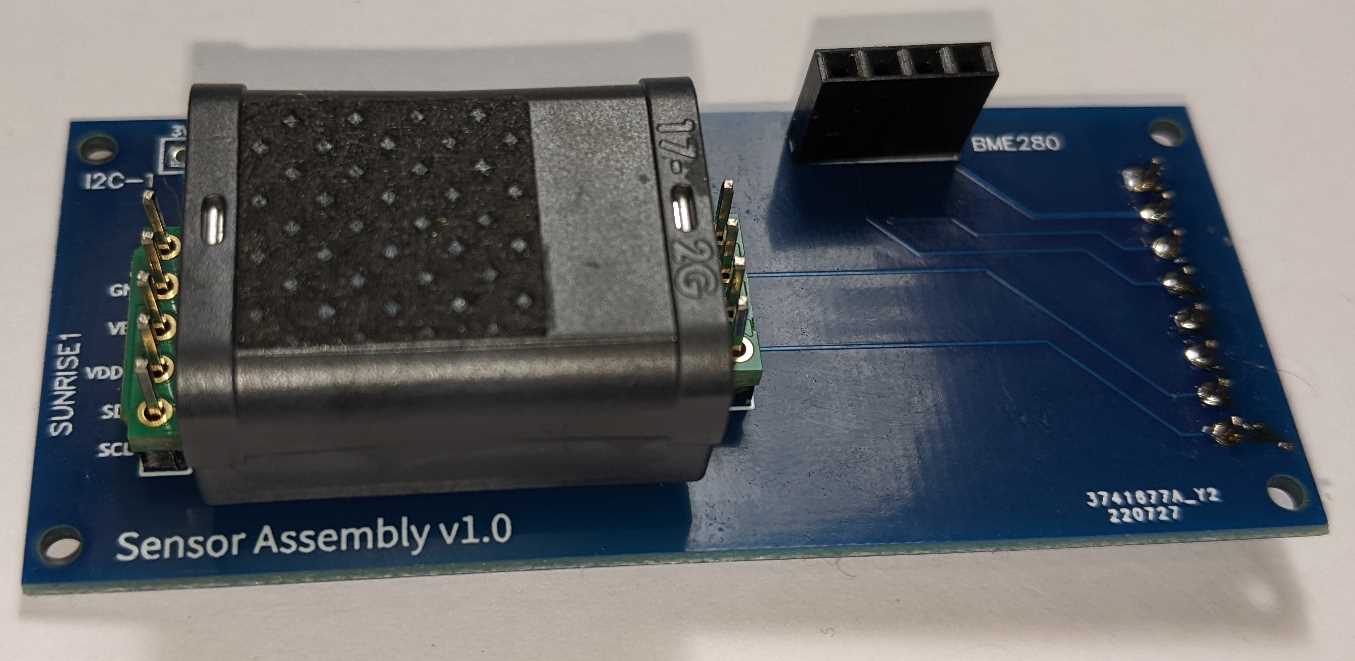
Solder each of the pin headers to the Senseair Sunrise sensor PCB. The PCB will appear as shown in the image below when this step is completed.